
Set up the onboarding checklist
Build the first-week checklist new teammates see, aim steps at everyone or one department, and follow each person's progress.
Who can use this
OwnerCompany adminRequirements
None beyond the role
New teammates see a checklist in their first week, as described in Your first week. You decide what is on it in Company admin → People → Onboarding.
Steps are company process, so they are stored in plain text, not encrypted. Progress is recorded per person. The profile, department channel and authenticator steps tick themselves.
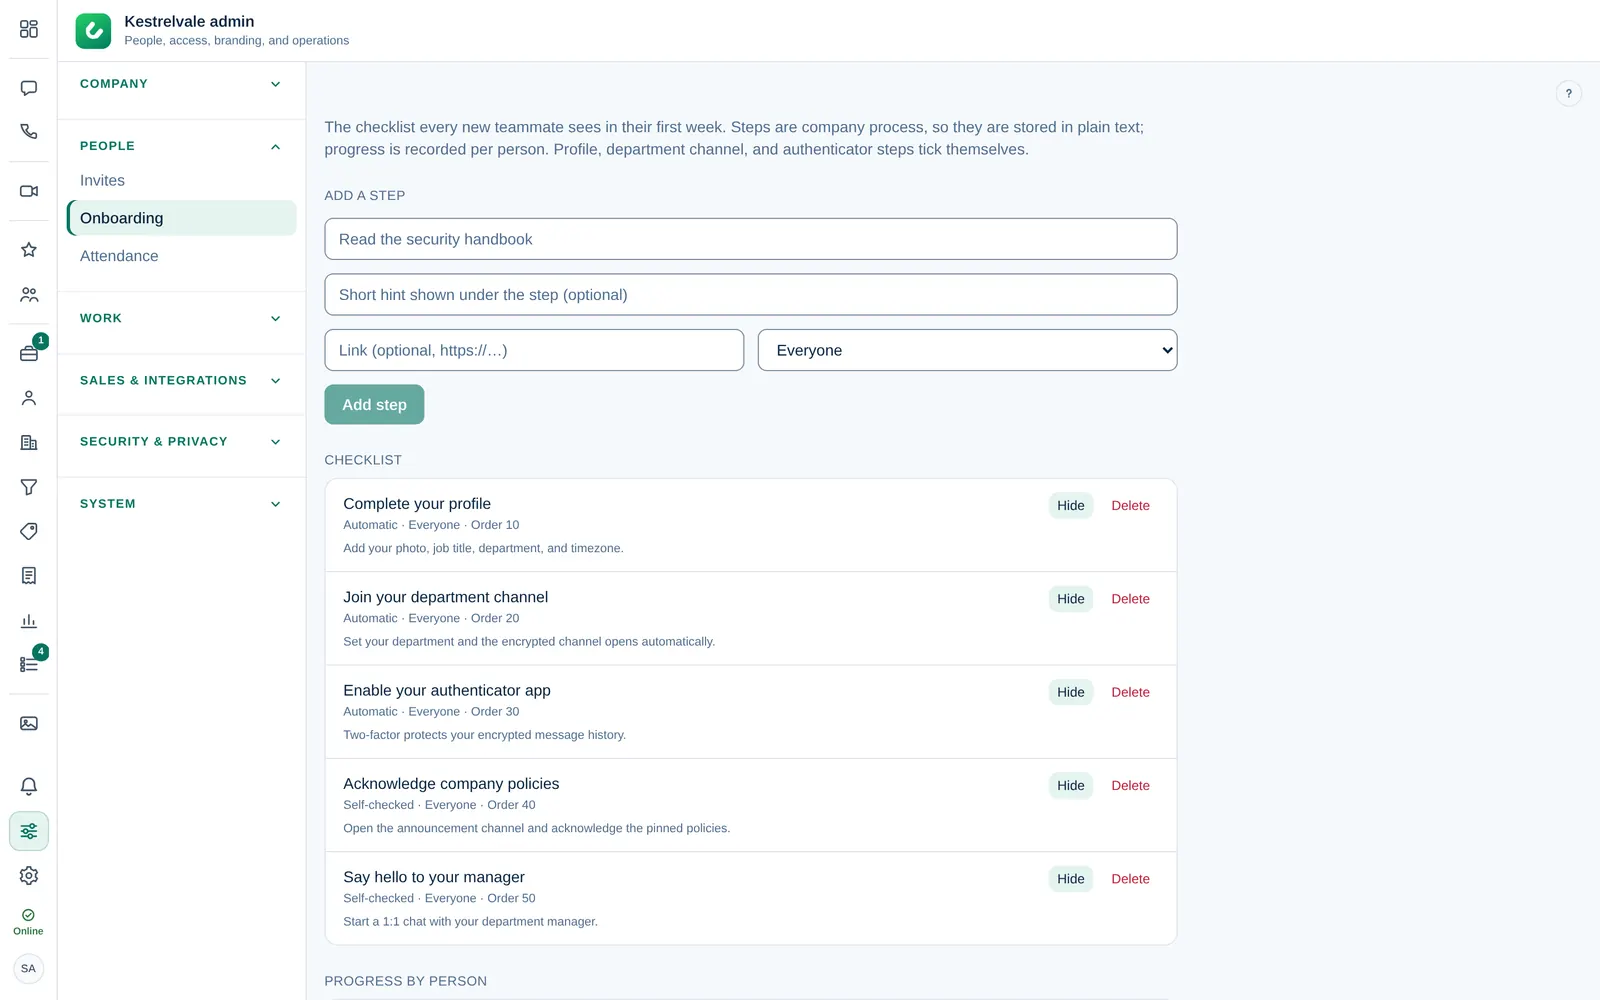
Add a step
- Under Add a step, enter the Step title, for example "Read the security handbook".
- Optionally add a Short hint shown under the step (optional) and a Link (optional, https://…).
- Choose who sees it: Everyone or one department.
- Select Add step.
Manage the checklist
The Checklist lists every step in order. Each step is tagged:
- Automatic: Dromix ticks it when the person has done it, for example set up an authenticator;
Self-checked: the person ticks it themselves.
- Hide takes a step off the checklist but keeps the progress already recorded. Show brings it back.
- Delete removes the step for good. Progress recorded for this step is removed too, so use Hide if you want to keep the history.
Follow progress
Under Progress by person, people who joined recently show up with their checklist progress, including the steps that are still pending.
- Nobody is onboarding yet means no recent joiners. Use Invite people to add someone.
- No checklist steps yet means the checklist is empty. Add the first step above.