
Connect Stripe and take payments
Connect your own Stripe account with Test and Live keys so customers can pay proposals and invoices online, and Dromix marks them paid.
Who can use this
OwnerCompany adminRequirements
None beyond the role
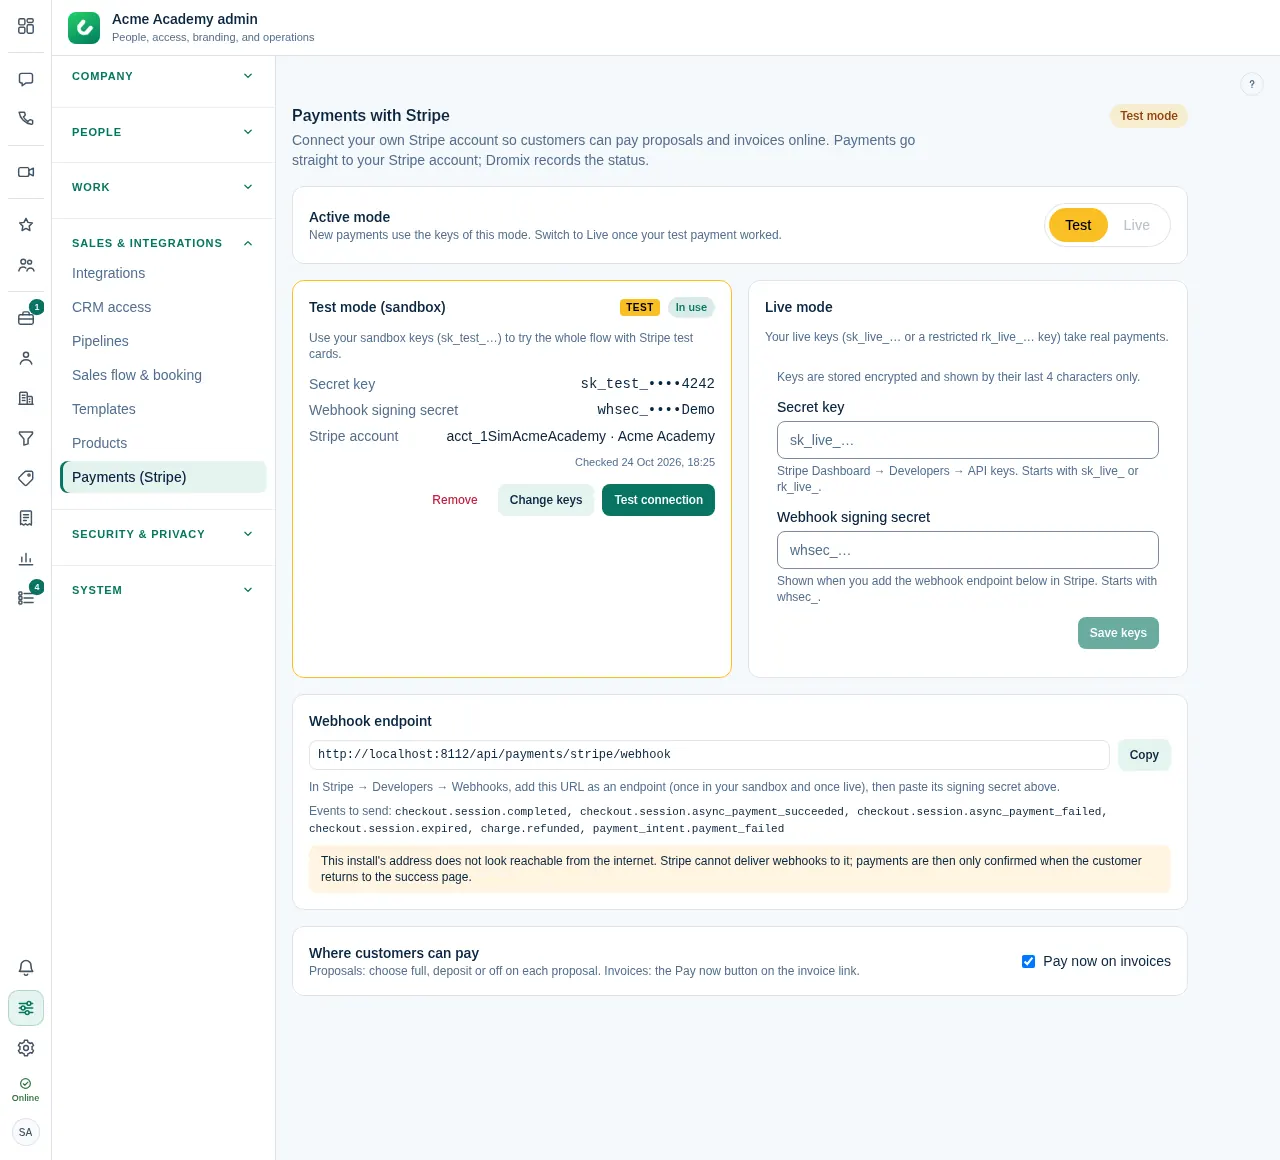
Owner and Company admin open Company admin → Sales & integrations → Payments (Stripe). Payments go straight to your own Stripe account through Stripe's hosted Checkout page. Dromix never sees card details; it records the status of each payment.
Add your keys
Stripe has two modes. Use Test mode first to try everything with Stripe test cards, then switch to Live.
- In the Stripe Dashboard, open Developers → API keys and copy the Secret key (
sk_test_…in your sandbox,sk_live_…live). A restricted key (rk_…) also works. Dromix does not need the publishable key. - In Dromix, paste it into Secret key on the Test mode or Live mode card.
- Add the Webhook signing secret (see below) and select Save keys.
- Select Test connection. Dromix shows the Stripe account it connected to.
Keys are stored encrypted and shown by their last 4 characters only. To replace a key, select Change keys; leave a field empty to keep its value.
Connect the webhook
Stripe tells Dromix about payments through a webhook.
- Copy the address under Webhook endpoint. It ends in
/api/payments/stripe/webhook. - In Stripe, open Developers → Webhooks, add an endpoint with this address and select the events listed on the page.
- Copy the endpoint's Signing secret (
whsec_…) into the matching mode in Dromix.
Do this once in your sandbox and once live: each mode has its own signing secret. Stripe must be able to reach your Dromix address from the internet. If the page says the address does not look reachable, payments are only confirmed when the customer returns to the success page.
Test and Live
Active mode decides which keys new payments use. While Test mode is active, the customer's payment pages show a TEST ribbon and no real money is charged. Switch to Live once a test payment worked. Payments made in one mode are never changed by events from the other.
Pay now on proposals
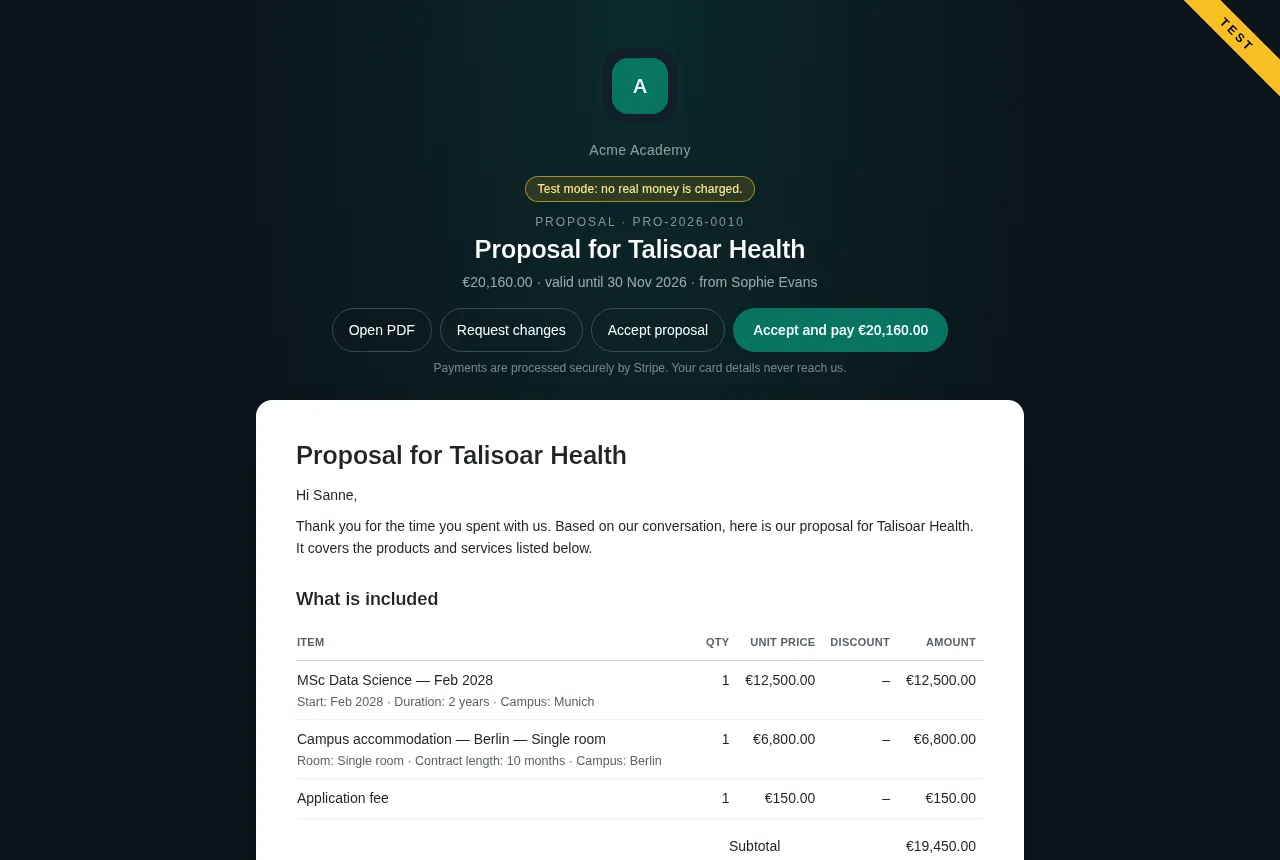
When Stripe is connected, every proposal has an Online payment field in the editor: Full amount (the default), Deposit with a percentage, or Off.

On the proposal link the customer sees Accept and pay. Paying counts as accepting: the proposal is accepted only when the payment succeeds. A customer who already accepted sees Pay now. Pay now is closed when the proposal is expired, voided or already paid.
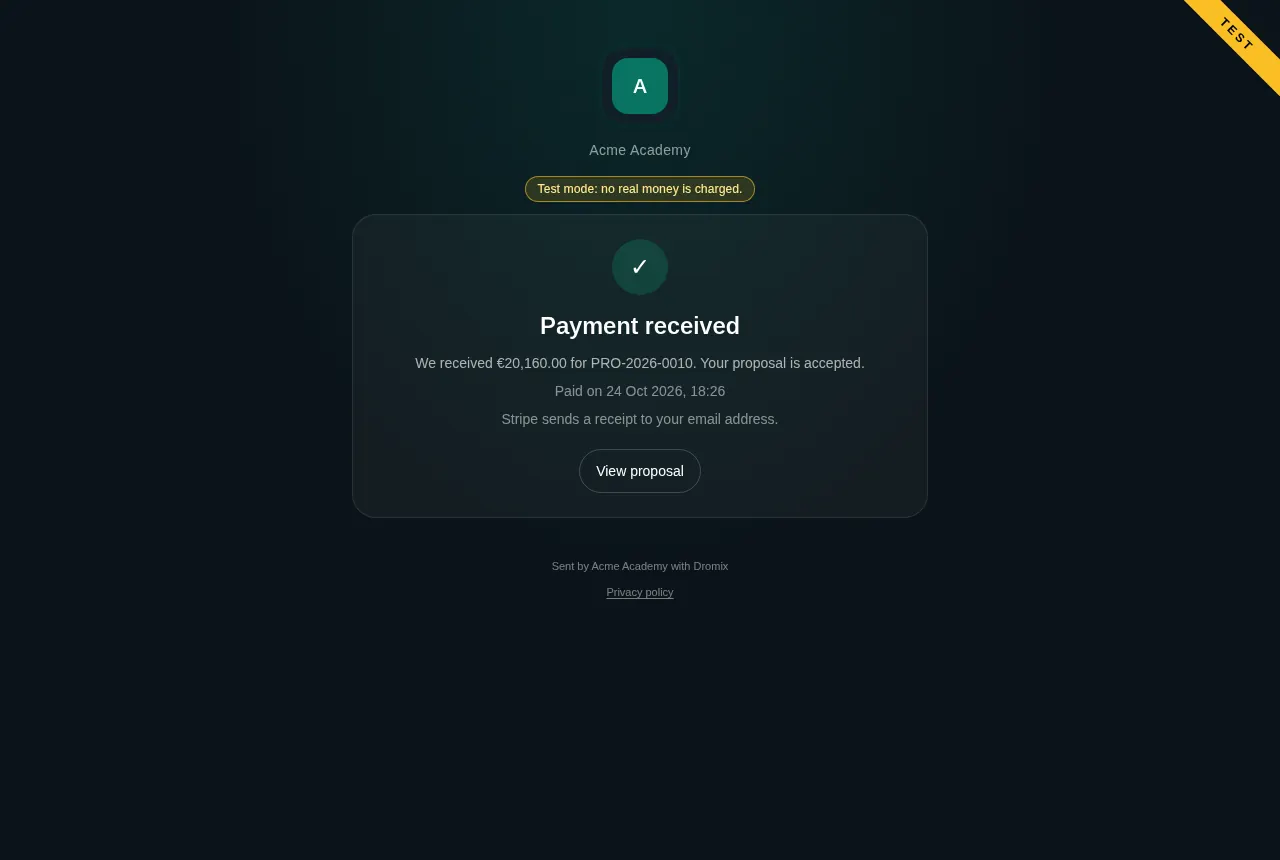
After paying on Stripe's page the customer comes back to a Payment received page. If they cancel, they see Payment cancelled and can go back to pay.
What happens after a payment
When Stripe confirms the payment, Dromix:
- accepts the proposal (if it was not accepted yet),
- marks the deal's open invoice paid, or creates and issues the invoice from the proposal,
- moves the deal to Won,
- adds an entry to the deal's activity, and
- emails the invoice to the customer with a short Payment received note, from the same sender as your invoices.
A deposit is recorded as a part payment on the full invoice: the invoice stays open with the balance due, and the deal still moves to Won. Stripe's payment page stays open for 24 hours; after that the customer starts again from the proposal or invoice link.
The deal's Invoices tab and the invoice show the payment under Online payments with its status, amount, a TEST badge for test payments, the Stripe ids and the date. Select the pi_… id to open the payment in the Stripe Dashboard.

A refund made in Stripe changes the payment to Refunded or Partly refunded. The invoice is not changed; issue a credit note if needed.
Pay now on invoices
Turn on Pay now on invoices under Where customers can pay to add a Pay now button for the open balance to the invoice link.
Bank transfer keeps working next to it: the invoice link still shows your bank details, and you record bank payments with Record payment as before (see Get paid and record payments).