
Your first 10 minutes as a Company admin
Six short steps that get a new Dromix workspace ready for the team, from the company profile to CRM access and channels.
Who can use this
OwnerCompany adminRequirements
None beyond the role
You are an Owner or Company admin and the workspace is still empty. Do these six steps in order: each one prepares the next, and the whole round takes about ten minutes.
On a new Dromix, the setup wizard walks you through the company info, modules, brands, pipelines, team, inboxes and channels in seven steps, one after the other. Open it from the Setup card on your dashboard or with Open the setup wizard in Company → Settings; it opens right there in Company admin. The steps below remain a quick manual route.
Everything below happens in the Company admin console. Open it with the sliders icon in the left rail, or from your account menu on a phone.
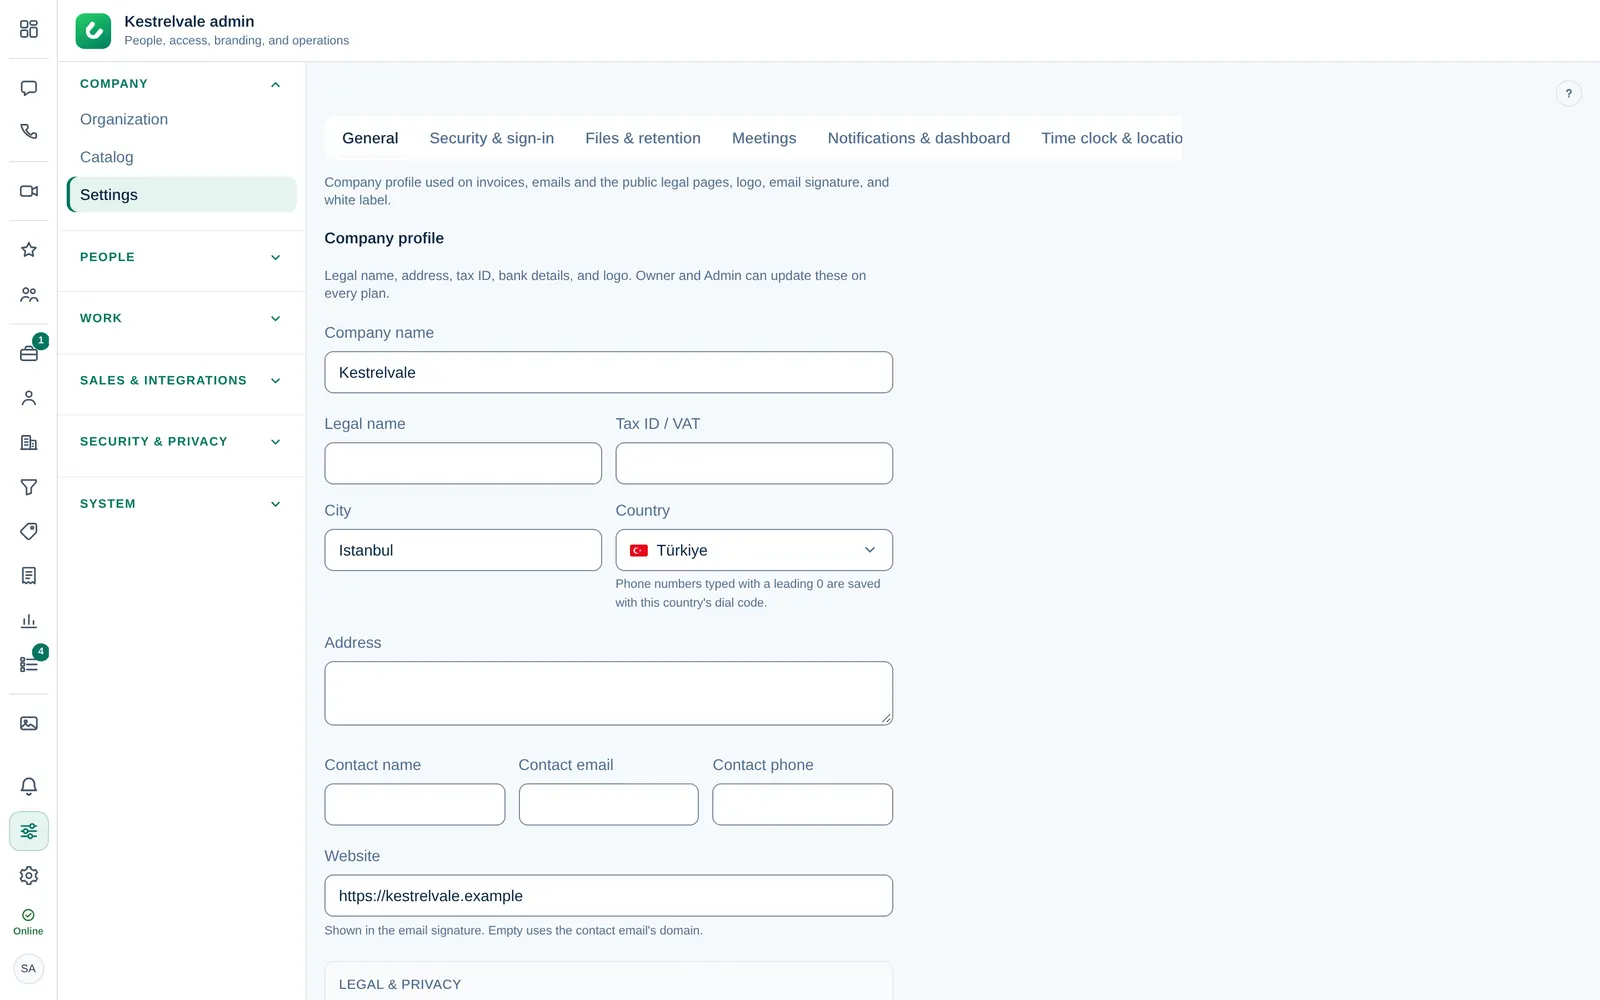
1. Fill in the company profile
- Open Company → Settings → General.
- Enter the company name, legal name, address and contact details. They appear on invoices, emails and your legal pages.
- Upload the logo, then select Save.
A custom brand colour and hiding "Powered by Dromix" (white label) need a plan with branding: Business or Enterprise.
2. Build the Catalog
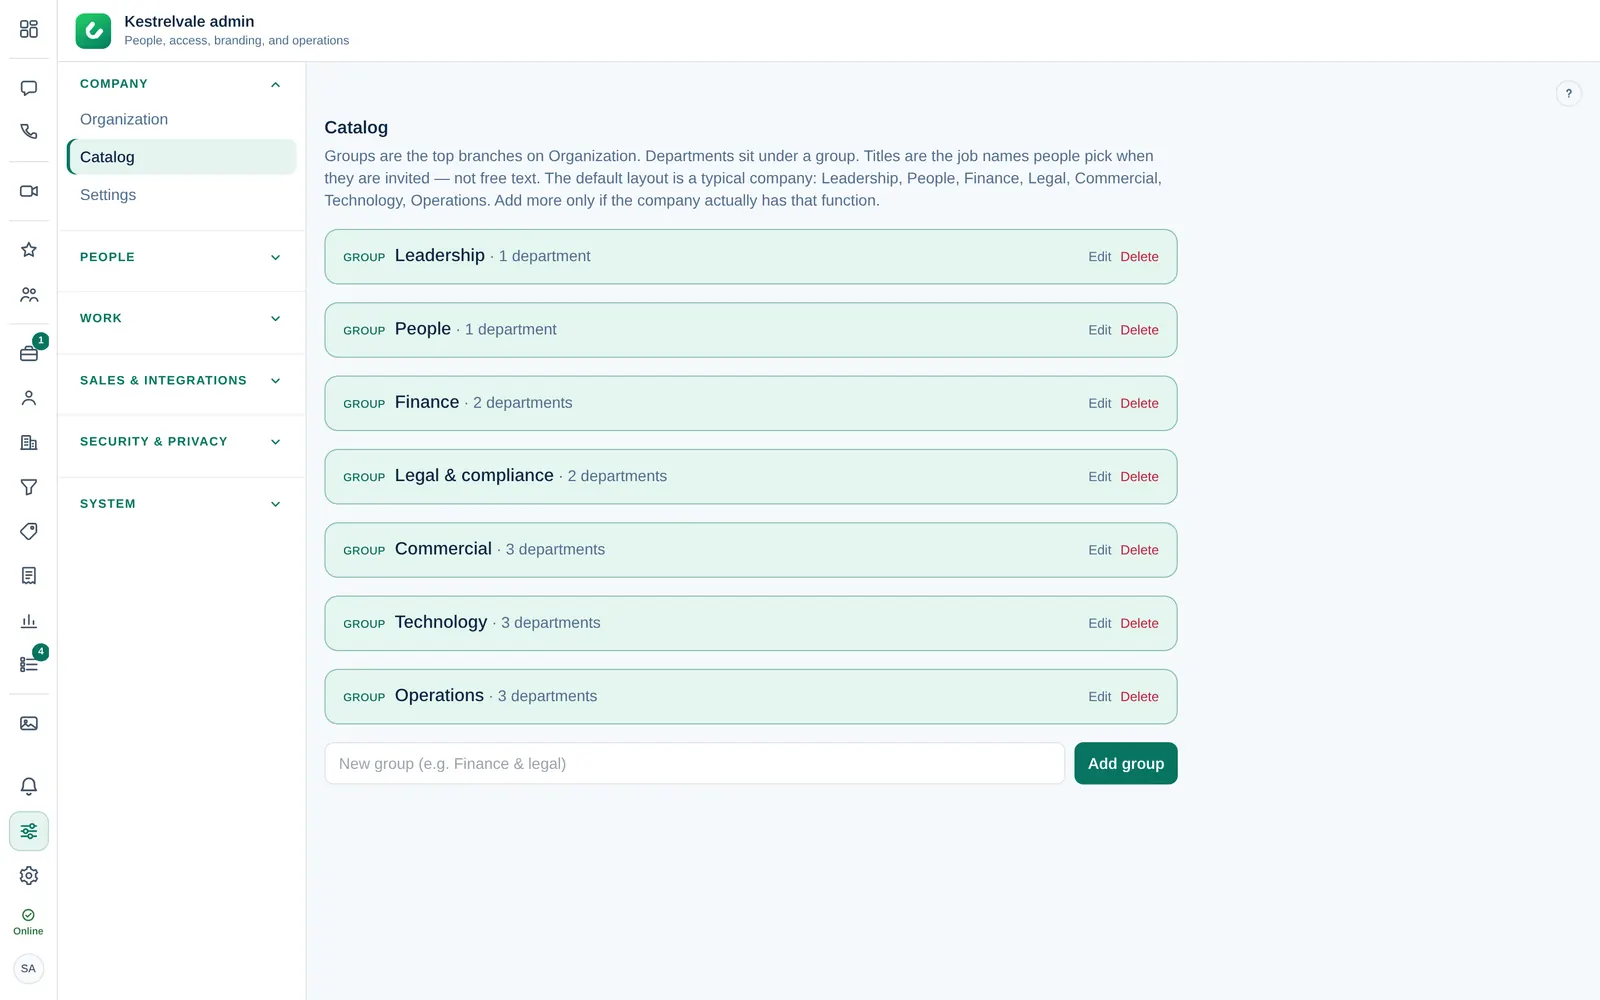
Invites need a department and a job title, and both come from the Catalog instead of free text.
- Open Company → Catalog.
- Keep the default groups (Leadership, People, Finance, Legal, Commercial, Technology, Operations) or rename them.
- Add the departments you actually have, and the job titles for each department.
3. Invite your team
- Open People → Invites.
- Invite each person with their role, department and title, and send them the link.
Department managers are invited as Members first and promoted later in Organization. Invite people and choose a role explains all six roles.
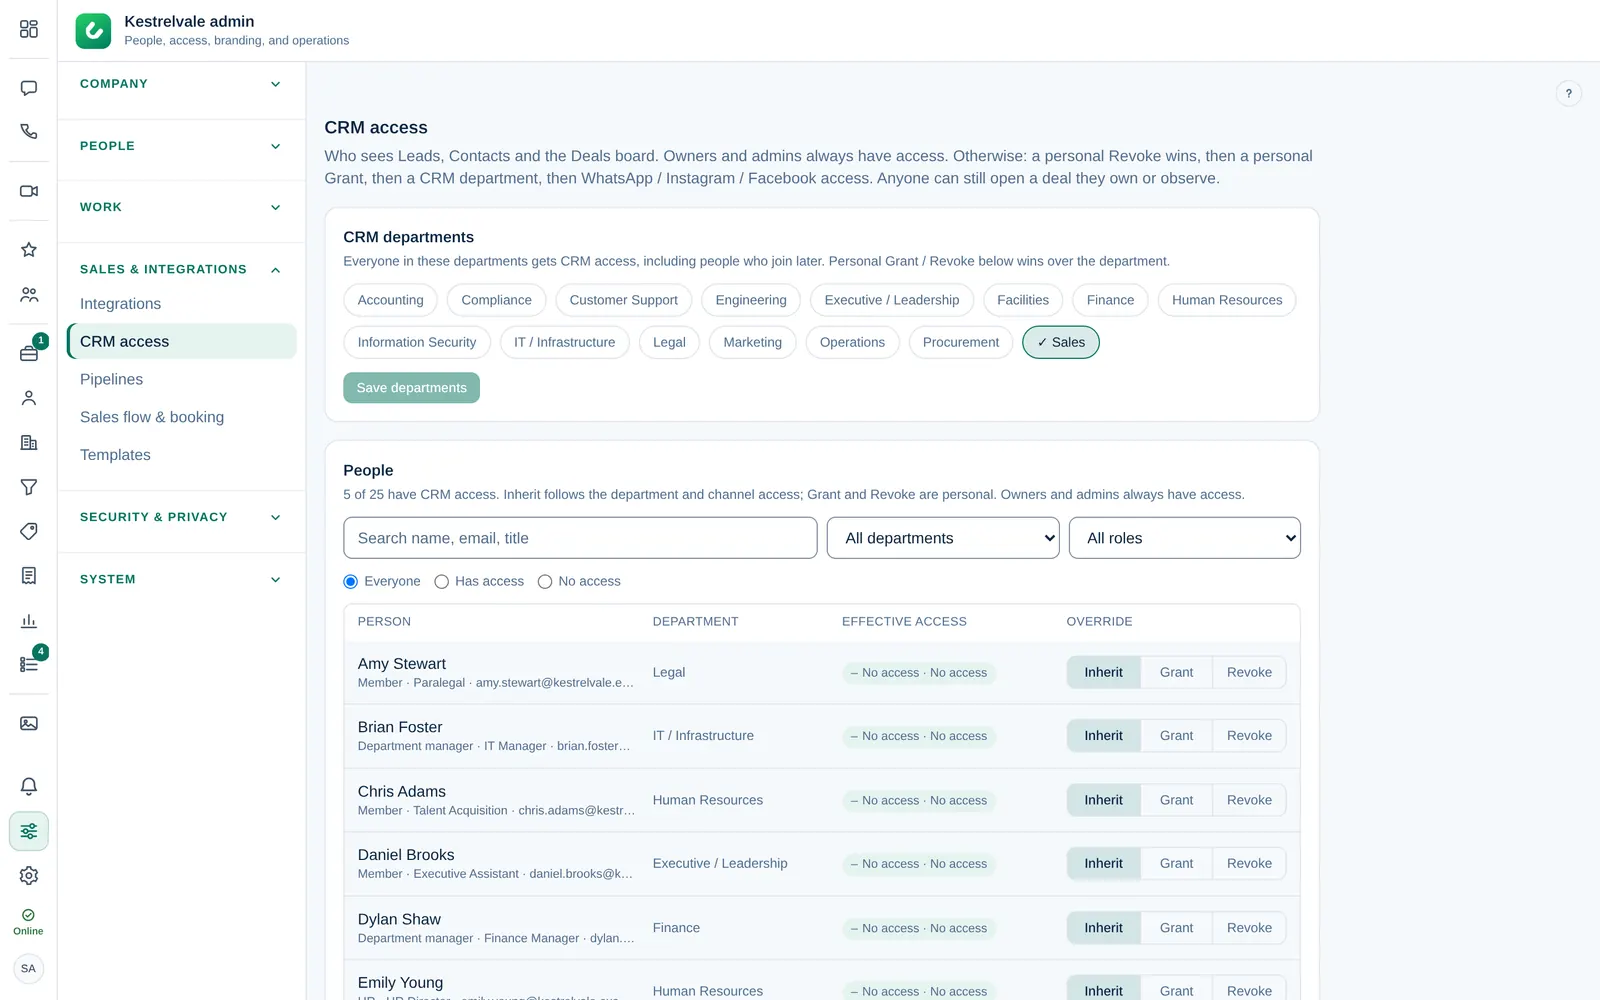
4. Decide who gets CRM access
CRM accessCRM access Permission to open Leads, Contacts, Companies and the Deals board. Owners and Company admins always have it; other people get it through their department, a personal grant, or access to a messaging channel. opens Leads, Contacts, Companies and the Deals board. Owners and Company admins always have it; everyone else needs one of these:
- their department is ticked in Sales & integrations → CRM access,
- a personal Grant on the same screen (a personal Revoke wins over everything),
- access to a WhatsApp, Instagram or Facebook channel.
People without CRM access can still open a dealDeal A sales opportunity with a value, an owner and a stage in a pipeline. Deals are what the Deals board, the forecast and the sales reports count. they own or observe, for example when a colleague adds them as an observer.
5. Check the sales pipeline
- Open Sales & integrations → Pipelines.
- Rename the stages to match how you sell, and set the win probability of each stage for the forecast.
- Keep one Won and one Lost stage: the Deals board, reports and lost reasons rely on them.
Move a deal through the pipeline shows how your team then uses the board.
6. Connect channels and secure sign-in
- Open Sales & integrations → Integrations and connect what you use: WhatsApp Business, Instagram, Facebook Page, company mailboxes, calendars and the web forms.
- Open Company → Settings → Security & sign-in. Limit invites to your company email domains and decide whether everyone must use an authenticator app.
Turning on the authenticator requirement asks every person to set it up at their next sign-in. Tell the team before you switch it on.
What next
- Company → Settings → Time clock & location switches the time clock and team map on. It is off by default and nobody is asked for their location while it is off.
- Security & privacy → Audit log lists invites, role changes and other admin actions.
- Questions? Use the contact box at the bottom of this page.